Building a Beta Sensor
Hardware Required
- Raspberry Pi 3 Model B
- 32Gb Micro SD Card
- 2.5 amp Micro USB Power Supply
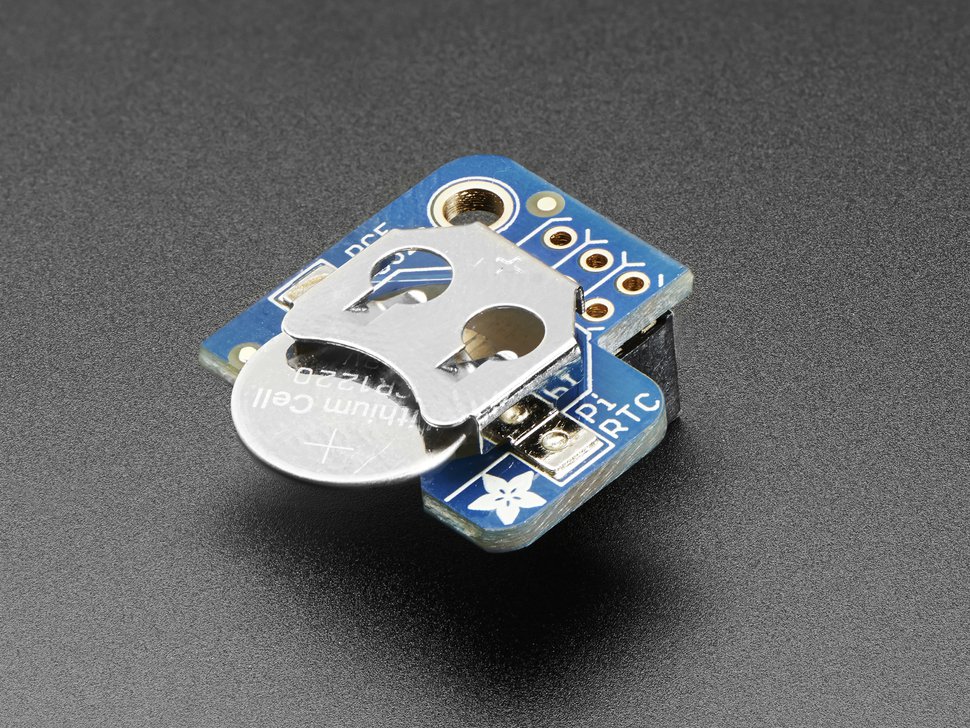
- Adafruit PiRTC – PCF8523 Real Time Clock for Raspberry Pi
- CR1220 Coin Cell Battery
- Logitech HD Webcam C525
3D Printable Case
- Tinkercad editable model
- Thingiverse downloadable STL files
- M3x5mm(L)-5mm(OD) Metric Threaded Brass Knurl Round Insert Nuts
- M3 x 6mm Alloy Steel Hex Bolt Socket Head Cap Screws
Build Process
Assemble Hardware
The first step in getting to a working Measure the Future sensor is to assemble the hardware needed. Begin with the Raspberry Pi, the SD Card, the PiRTC unit, and the Coin Cell Battery.
- Insert the Coin Cell into the PiRTC Unit, with the + side (the flat side) facing up. (photo)
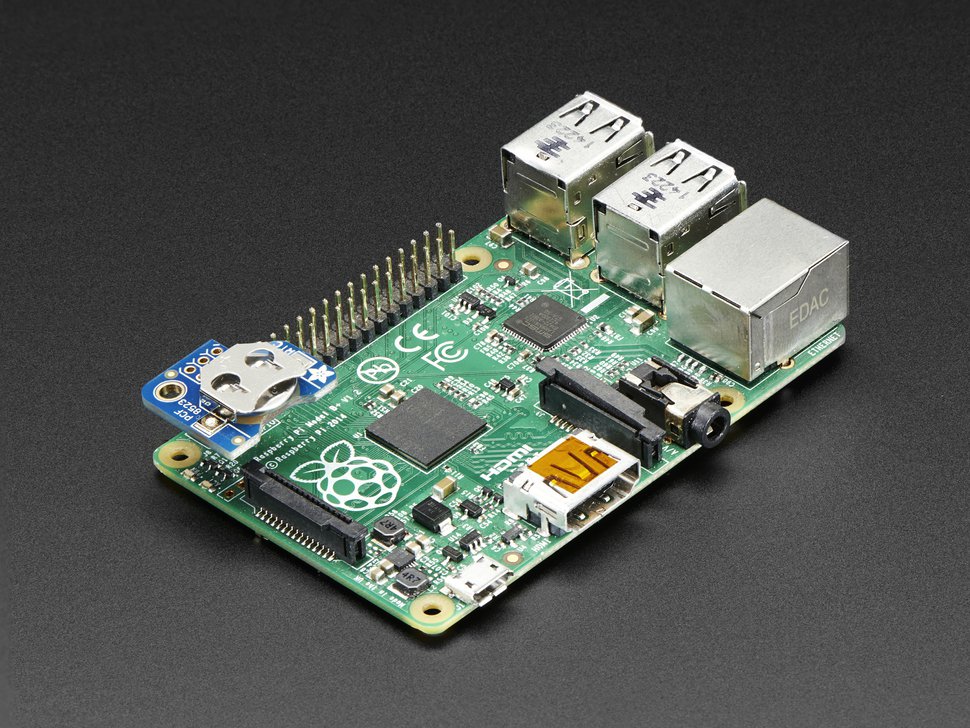
- Slide the PiRTC into place on the Raspberry Pi unit. (photo)
Install Software
Install Raspian onto the micro SD card.
- Download the March 2017 version of Raspian
- Flash Raspian to the SD card using a computer. I recommend using Etcher. This will take some time.
- Create an empty file named “ssh” (or download this one) and copy it to the drive named “boot” on the SD card (you should see this drive after Raspian finishes installing). You want the file to be named just “ssh”, with no extension. This enables you to connect to the RPi over the network via SSH.
- Eject the SD Card from your computer
Prepare Raspian for Measuring the Future
- Insert the card into the bottom of the Raspberry Pi.
- Plug the RPi into your network, and then plug it into a power source.
- Wait for your RPi to boot, then locate its IP address on your network.
- Once you know the IP address, you should be able to connect with
ssh pi@IP_ADDRESS, for examplessh pi@192.168.0.42 - The default pwd for the Raspberry Pi is
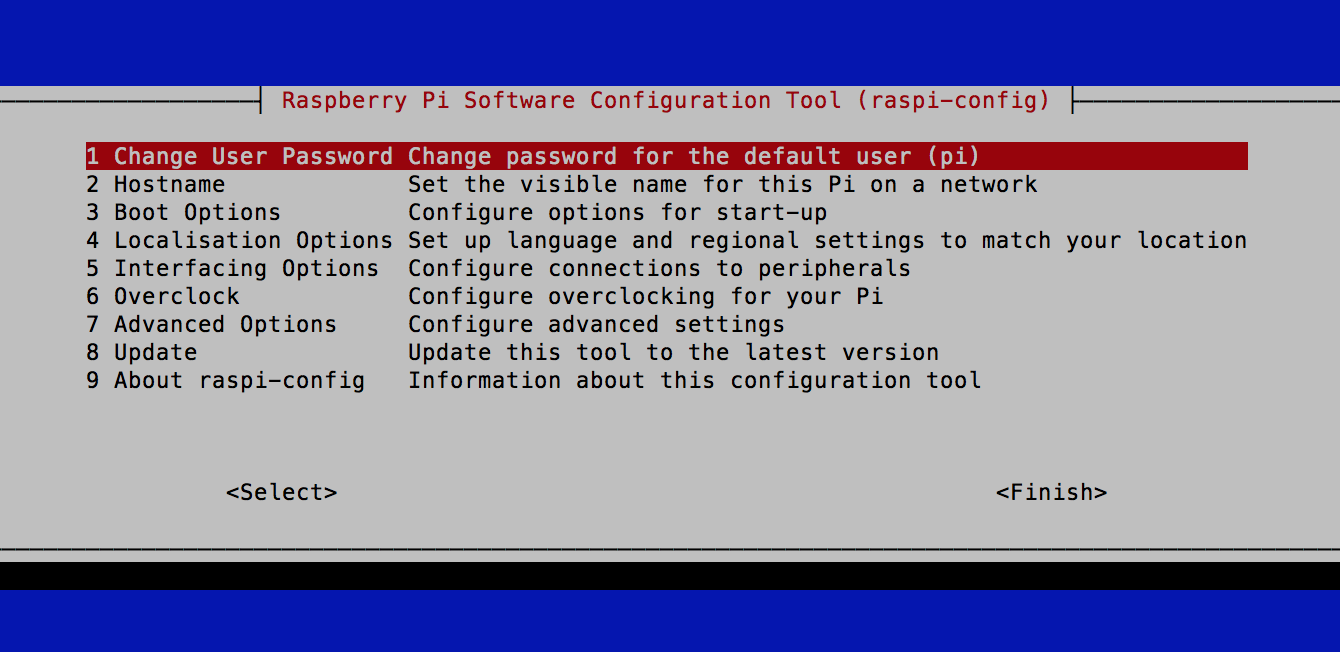
raspberry…we will change that in a future step. 🙂 - Once you are into the system, the first thing we need to do is make sure the RTC module is identified, change the user password, and make sure the file system is expanded. To do this, you need to enter the RPi setup utility via
sudo raspi-configand then:- Scroll to Change the Password
- Select that option, and change the password for the pi account. DO NOT FORGET THIS PASSWORD.
- Apply
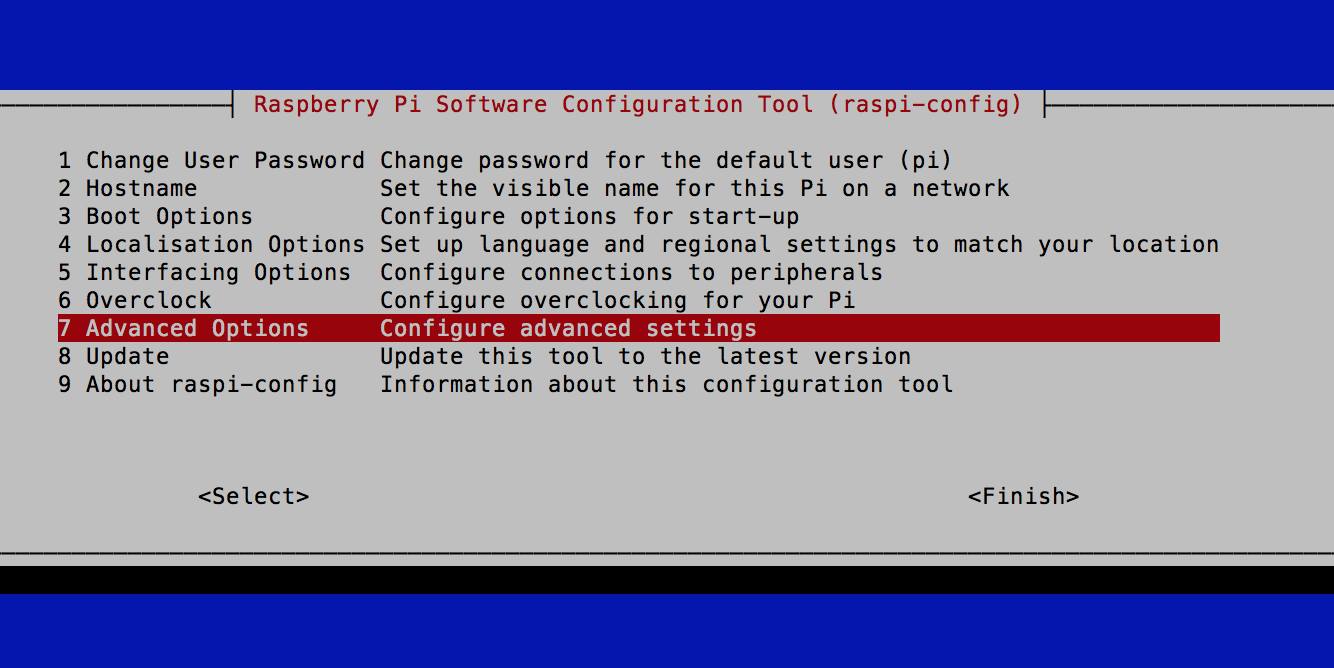
- Open config again via
sudo raspi-config - Scroll to Advanced Options
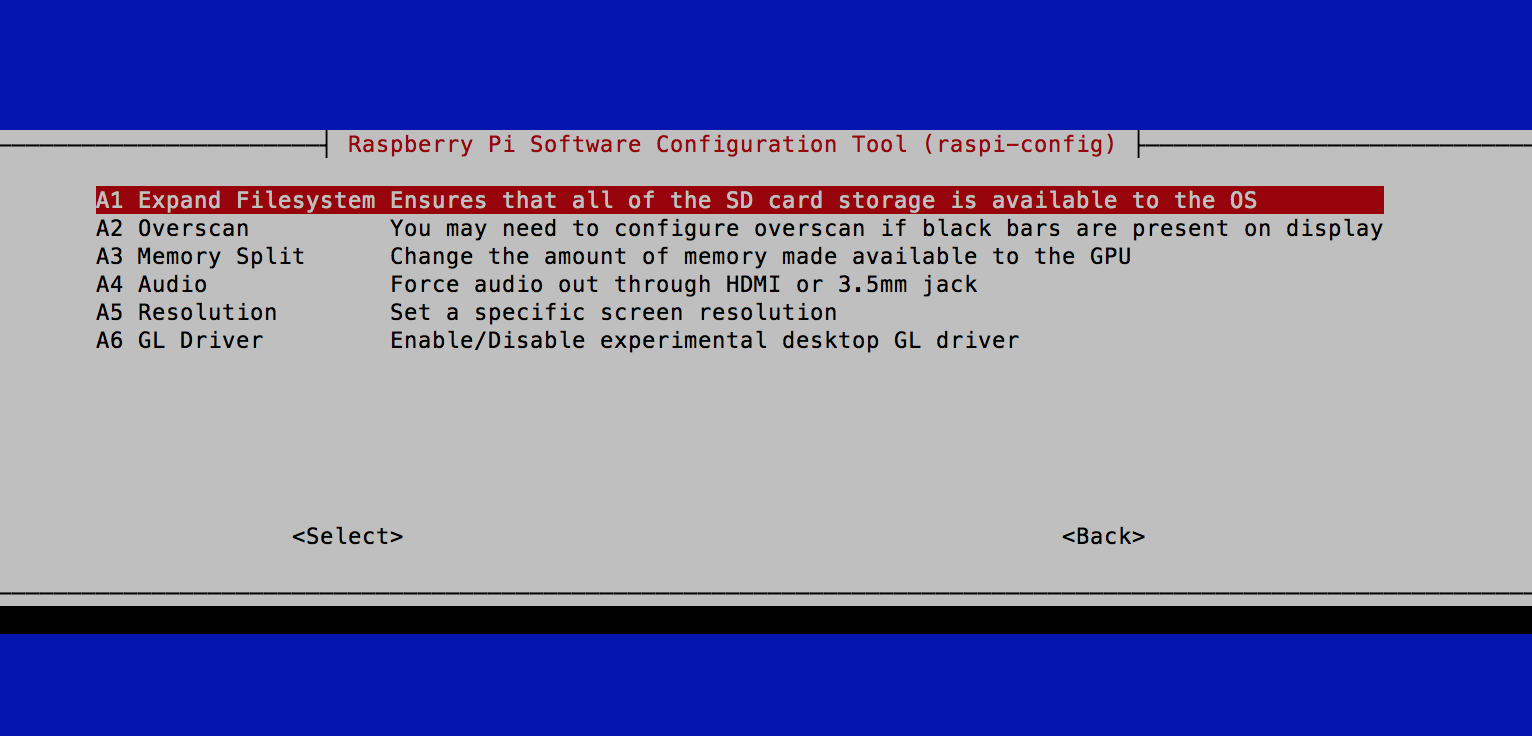
- Select, then choose
- Apply…it may ask you to reboot at this point. If so, do so, then log back in and return to raspi-config
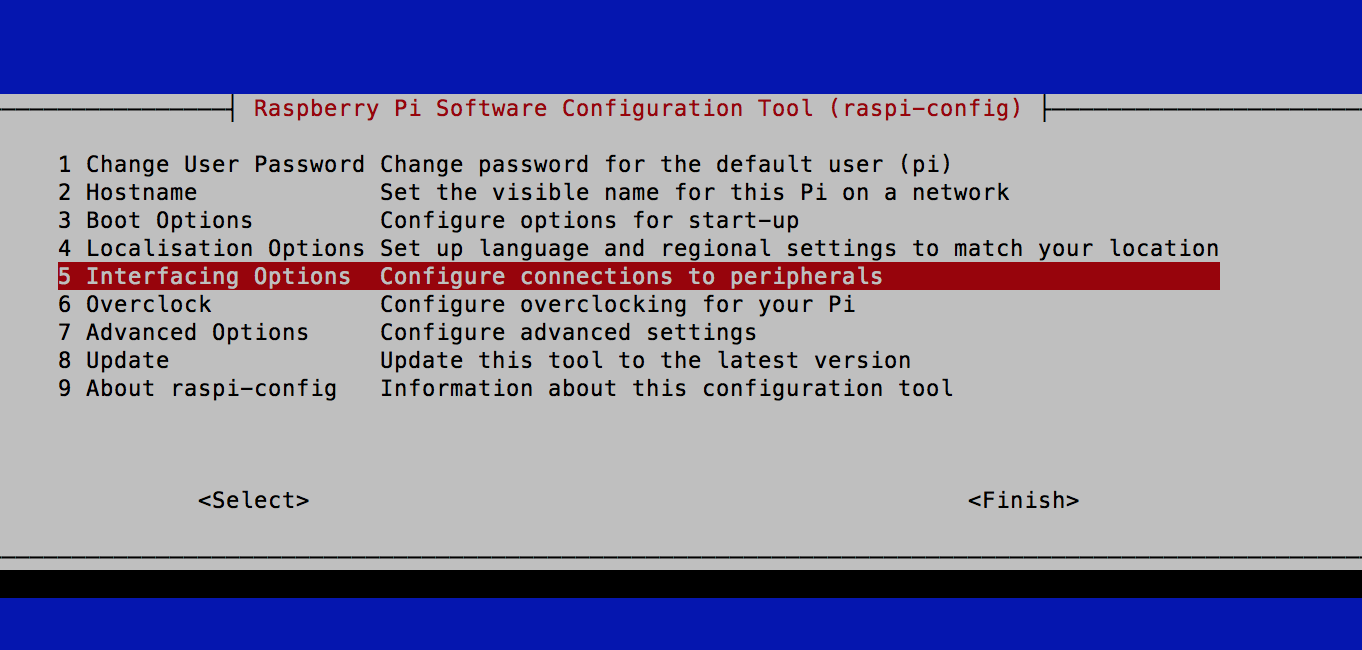
- Scroll to Interfacing Options
- Select, then choose Enable/Disable automatic loading of I2C kernel module
- Select that option, apply it, and finally….
- Reboot if prompted, and then log back in using your new password.
- Scroll to Change the Password
- Next we ensure that Raspian knows which updates it has….
- Run
sudo apt-get updateand wait for the process to finish.
- Run

Install Measure the Future!
-
- Run
wget https://raw.githubusercontent.com/MeasureTheFuture/installer/master/mtf-pi-install.sh - Run
chmod +x mtf-pi-install.shto make the just-downloaded file executable. - Run
sudo ./mtf-pi-install.shto install Measure the Future. - There will be three prompts at the end of the install process. One for a database password, one for a Wifi name, and one for a Wifi password. Fill these in as you wish, but _do not forget them_.
- Run
Enable the Real Time Clock module
This next section requires editing a couple of text files on the RPi. I’m sorry..will do my best to get a process in place ASAP that makes this bit easier.
- Run
sudo apt-get install python-smbus i2c-tools - Then run
sudo i2cdetect -y 1and you should see ID #68 show up in the resulting screen. If you do, the RTC is physically in the right place on the board. - Run
sudo nano /boot/config.txt - Scroll to the bottom of the file and add a new line that is:
dtoverlay=i2c-rtc,pcf8523 - Save file (Control-O) and exit (Control-X)
- Reboot the system via
sudo reboot, and give it a few seconds, then log back in via SSH and your new password. - Run
sudo i2cdetect -y 1and you should now see UU where the 68 used to be - Run
sudo apt-get -y remove fake-hwclock - Run
sudo update-rc.d -f fake-hwclock remove - Now one last edit of a file:
sudo nano /lib/udev/hwclock-set - The lines near the beginning of the file that read
if [ -e /run/systemd/system ] ; then

exit 0

fi
need to be commented out…add a # to the beginning of each of those lines so they look like this:
#if [ -e /run/systemd/system ] ; then

#exit 0

#fi - Once more, save (Control-O) and exit nano (Control-X)
- Run
dateand verify that the time/date is correct - Run
sudo hwclock -wto push that time/date to the RTC unit
That’s the end of software setup!
Optional Configuration
In some instances, you may wish to have the SSID of the sensor hidden, to prevent patron confusion and questions if they attempt to connect their devices to the wifi signal. This is easily done, but does make it more difficult to see if the sensor is “on” because you cannot see the SSID and must attempt to connect if you wish to see the sensor. If you wish to hide the SSID:
- Run
sudo nano /etc/hostapd/hostapd.conf - Scroll to the bottom of the file, and add the line:
ignore_broadcast_ssid=1to the bottom of the file. - Save (Command-O) and exit nano (Command-X)
Now, when you reboot your sensor, the SSID will not be visible to users. In order to connect, you’ll have to tell our computer to look for that SSID manually.
Final Steps
Plug the USB Webcam into your Raspberry Pi. If you’ve printed a Measure the Future Case, the final result will look something like this:
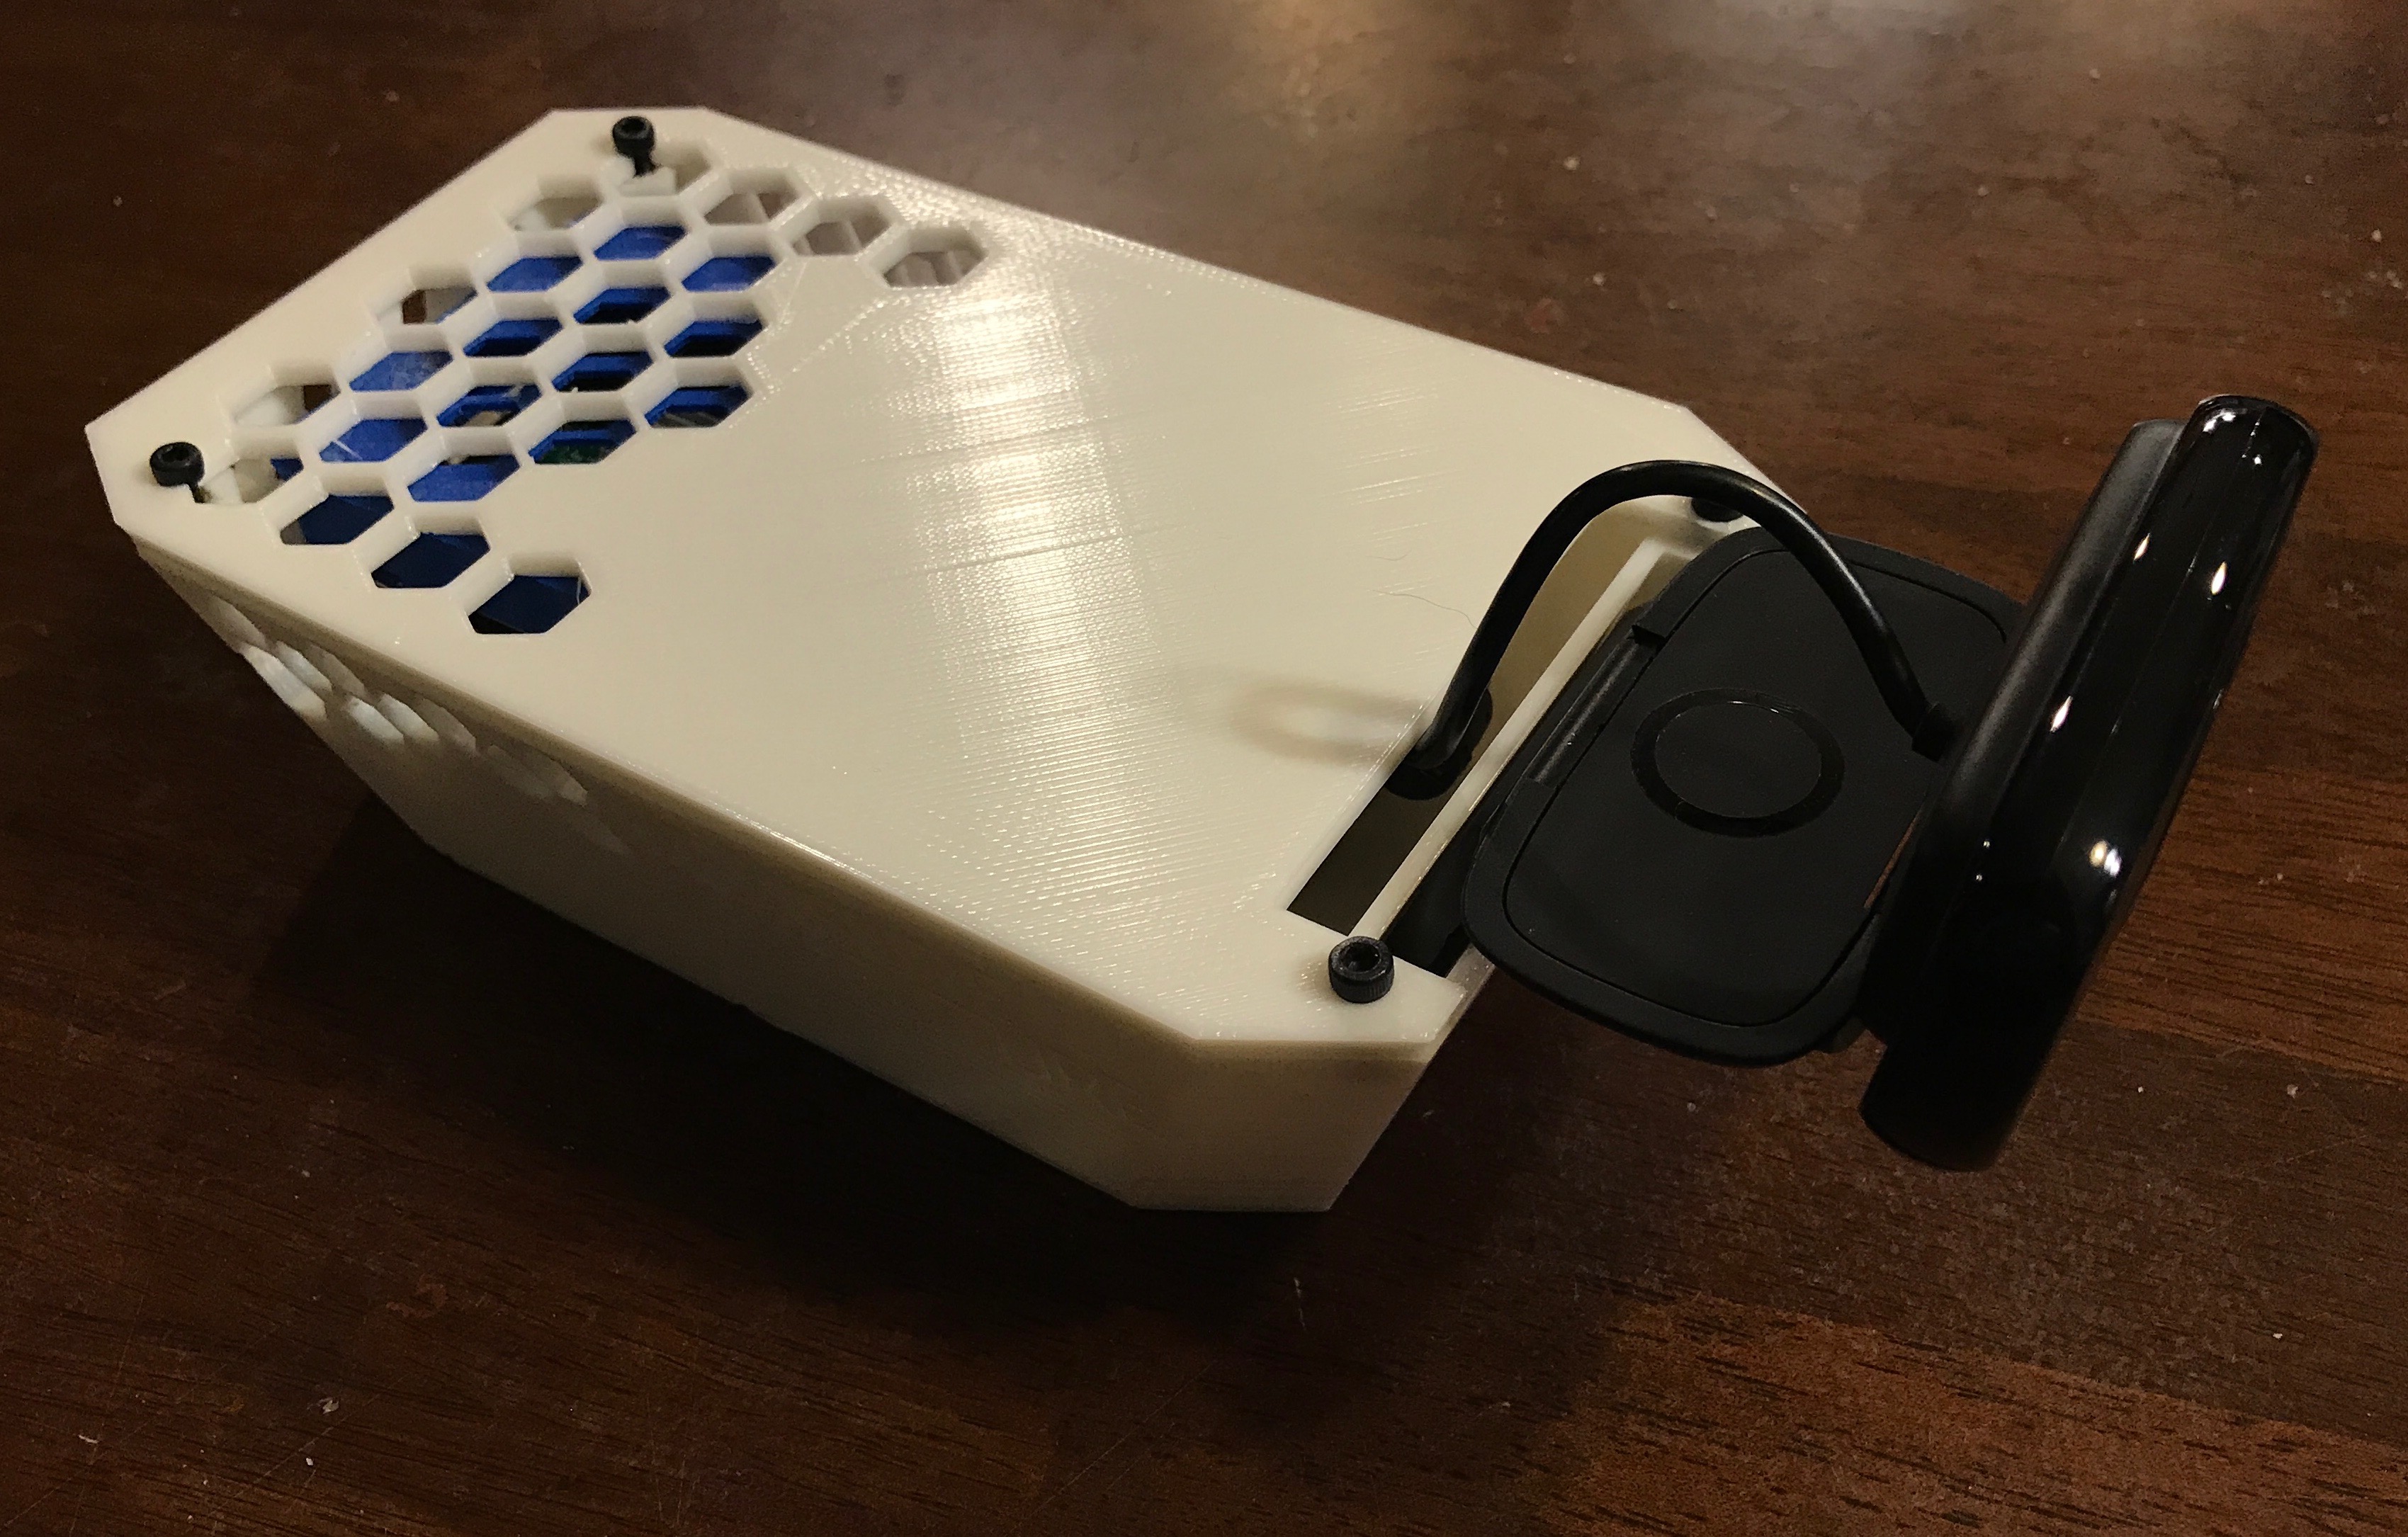
You can now move on to Configuring the sensor to measure activity and attention in your space.